One of the most common things I’m asked is how does the pet portrait process happen? What happens next after I’ve made my order?
So, I decided to make this post to give you an idea of how it all works!
Firstly it all starts with someone contacting me with an idea for a portrait. In this example a lovely customer contacted me about creating a portrait of her friend’s dog who had recently passed ❤️ she wanted it based on a photo with the dog wearing a crown. It’s great when a customer gives me clear instructions like this so I know exactly what I need to create. I always need at least one photo to work with for portraits, especially if the animal has particular markings eg. White patches. And always include a bit of information on the animal and its character along with any ideas you’d like to have included. This can be elaborate like some of my customers who want to include a lot of background or it can be simple, just asking for no background but maybe include a favourite treat or toy.
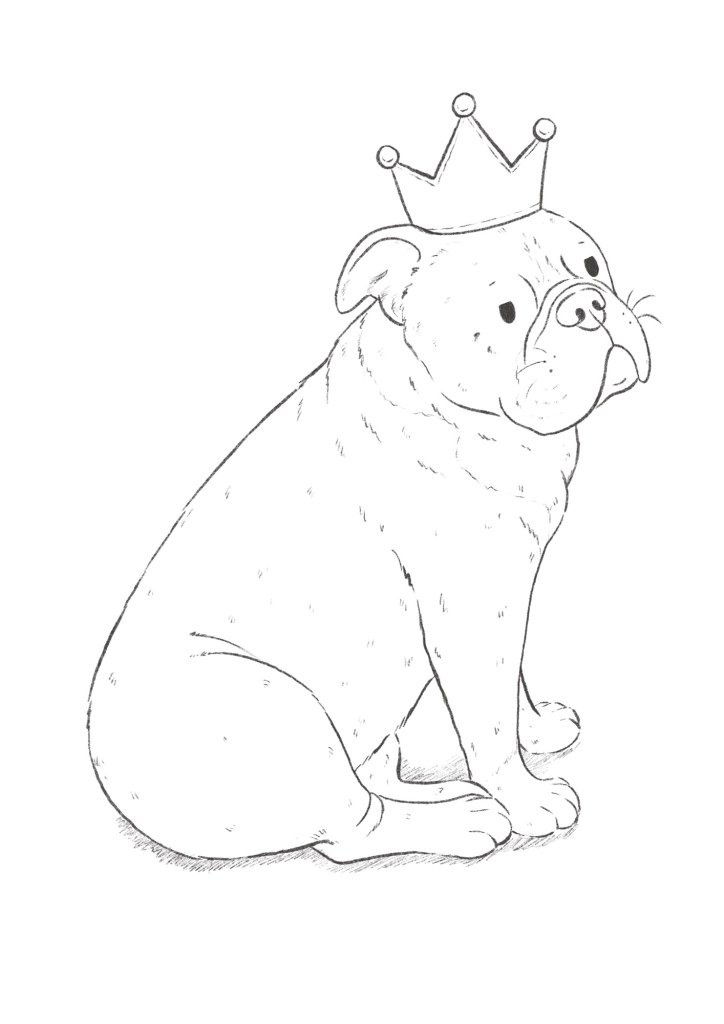
Once I have the reference images and information I get to work creating a rough sketch! This is something that confuses some people as they worry this is the final illustration but this is just a sketch to give you an idea of the pose for the portrait. At this stage I can easily make any changes so it’s really just a rough idea that we can change until you’re happy with it.

As you can see this is a fairly scruffy rough sketch but like I said, this is just an initial sketch to show you how the portrait would look with the pose and any other items that are included.
At this stage the customer asked for a small change to give him “resting bitch face” so I made the edits and it got approved so I moved to refining it and creating a final sketch for the portrait.
Once a sketch is approved I get started on the final painting! I transfer this sketch to watercolour paper if it’s a traditional painting or if it’s digital I just start adding the colours now. This was a traditional painting so I transferred the sketch to the watercolour paper and start to add colour!
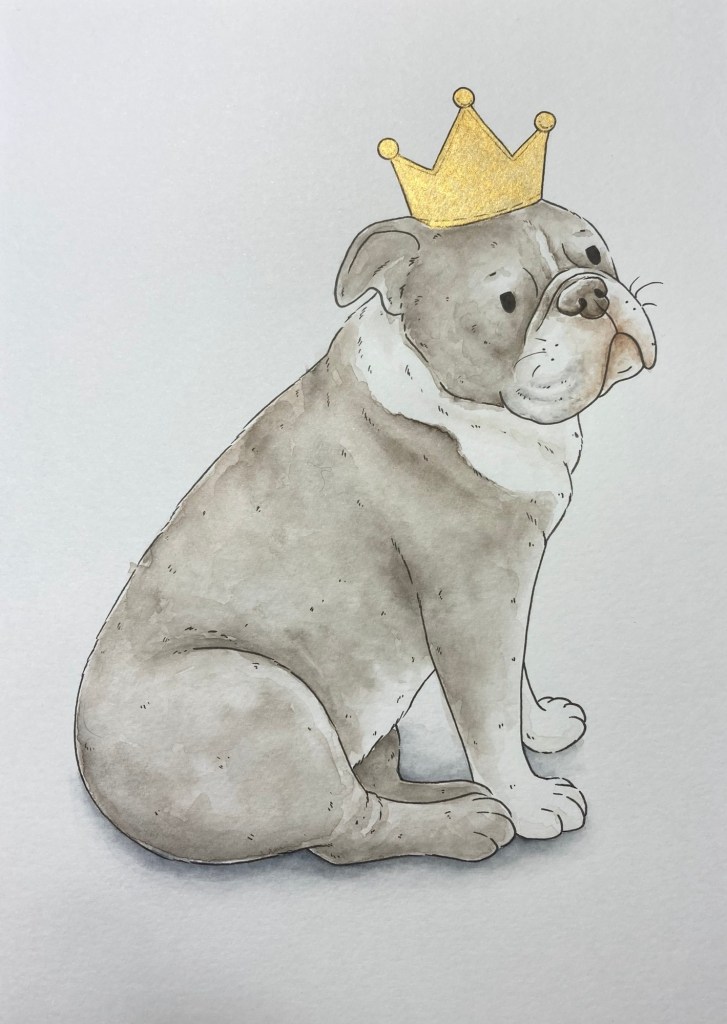
At this point I try to get the base colours and the shadows added. In this particular portrait as he had a crown I decided to make it shiny and metallic. I update the customer at all of these stages to make sure they’re happy with the progress and to confirm that I’m getting the colours and markings correct. This is important if I’m working from limited photos.
The customer was very happy with the progress at this point so I continued with the final layers of paint and added some extra details.

I send the final update to the customer and once approved the portrait is then packed with a backing board in a biodegradable cello bag to keep it protected and gets wrapped up in some tissue paper before being sent out to its new home.
And thats the full process of creating a pet portrait from the initial message to the portrait being posted. If this is a digital portrait the process is similar except after the final approval the portrait will be emailed to the customer.
If you have any questions about pet portraits you can always get in touch and ask me anything.
I hope this was helpful! Thanks for reading!
Siobhan
